![]()
Have you logged into your Hashtracking account lately? If not, you will be pleasantly surprised by our new, more visual layout on the My Hashtags page - your account’s command central.
Things you can do from the My Hashtags Page:
- Track a new Hashtag
- Activate and deactivate the Hashtags you already track
- Access your Analytics and Infographics
- Create & Export Reports
- Create and Share Infographics
- Add Hashtag History to a tag you are tracking
- Create a Custom Live Streaming Wall
- Archive Data from Inactive Hashtags
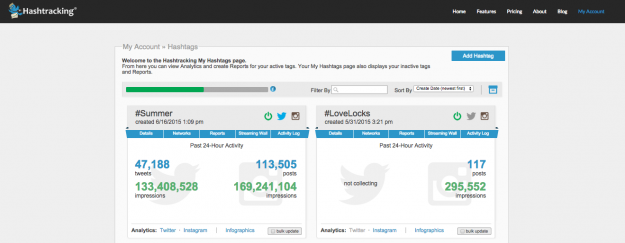
The first thing you’ll notice is that each hashtag has its own contained “box” that includes a section for the Hashtag on Twitter, and the Hashtag on Instagram. You can track Hashtags on either or both networks (note - each active Hashtag, on each network, counts as one active tracking slot in your account. Tracking a Hashtag on two networks = two slots.)
Account Info Area:
Across the top of the page you will see:
A fuel gauge showing you how many of your allotted Hashtag slots have been filled, a couple of ways to search and filter your hashtags, and a button for adding a new Hashtag.
There is also a file box icon. Clicking this icon will take you to your archives.
24 hr Activity and More - What’s inside the Hashtag Box:
In the center of the Hashtag box, in a large bold font, you will see tweet/post and impression numbers atop the associated platform symbols. This is a 24 hr (or since tracking started if less than 24hrs) activity snapshot. This makes it easy to see recent hashtag activity at a glance. It’s easy also easy to see which networks are currently actively tracking by seeing which logos are “lit” in the top right hand corner of the box.
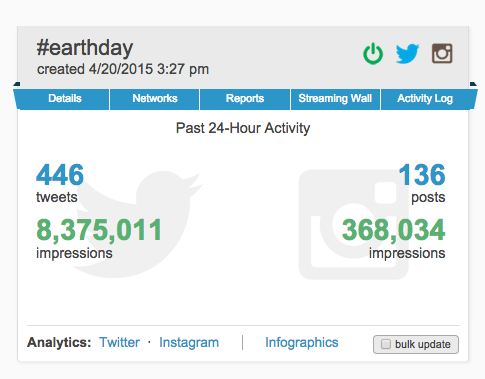
Moving from left to right, below the “created” date, there are four clickable pull down tabs that you should become familiar with. These give you finer control over your data. They include Details, Networks, Reports, Streaming Wall, and an Activity Log. We’ll look at these tabs individually next.
The Pull Down Tabs
Click to open a tab, click again to close. Below you can see the dialog for each tab.
Details Tab:
Here you can designate a display name for your hashtag. The hashtag name will still be visible on your reports, below the display name. This is handy when you have a group of hashtags for a single client, or if you want to display the brand or product name at the top of your report.
You can also choose to add historical data to your hashtag via this tab.
Networks Tab:
Here is where you activate and deactivate your Hashtags - on either Twitter or Instagram, at any time. If you turn off both networks the hashtag box will drop down to the bottom of your My Hashtags page, along with any other inactive tags. You can activate, deactivate and reactivate tracking at will. It’s important to note that data is only saved when you are actively tracking. If you deactivate a hashtag, you will not be capturing the data any longer.
Reports Tab:
Here you can create a report by entering a date range and select info.
You will also see your saved reports in this tab.
Clicking on the down arrow allows you to select a setting to create a shareable shortened “Display” version of the report without the entire transcript. You can also set the report URL to public or private (the default is private). If you set up spam filtering when you created the report - the level of filtering (high/low/none) will be indicated here.
Streaming Wall Tab:
This tab allows you to create a live hashtag “feed” from the data you are collecting. Click on this tab to turn the feed on, and then click the menu options to configure your live streaming wall the way you want it. You will be able to choose from multiple networks and several of your hashtag infographics. When you are happy with your choices, hit the “update” button to generate your streaming wall. You can always make changes later - just hit “update” to refresh.
There is also the ability for you to brand the streaming wall with your own images.
Once the streaming wall has been set to “on”, the link to view the streaming wall will also display on this pull down tab
Activity log Tab:
This tab gives you a list of all activity (start and stop times) for this hashtag, on all platforms you are tracking.
Digging In - Accessing Analytics and Infographics:
Across the bottom of the Hashtag box you will see links to Twitter and Instagram Analytics (if you are tracking both). Clicking on these links will take you to a Master Analytics page for that Hashtag/Platform, where you can
- Access all the data you’ve collected on that hashtag
- Zoom in or out on time periods,
- Create reports
Clicking on the Infographics link will take you to a set of handy shareable infographics generated with your data. These can also be configured by date.
Finally, the bulk update box allows you to choose multiple hashtags and perform operations in bulk. This is handy if you wish to activate or deactivate multiple hashtags, and if you wish to archive multiple hashtags.
Have any Questions? Don’t Hesitate to Email or Tweet us for Support!
We hope this tour of the new My Hashtags page answers some of your questions. Got a comment or suggestion? We’d love to hear how this new set up is working for you.

Comments are closed.